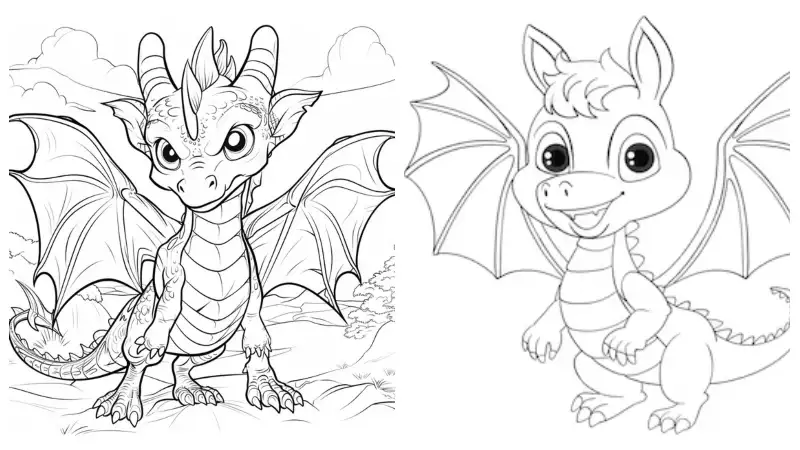
This article offers a detailed guide on drawing a dragon, perfect for both beginners and experienced artists. It covers every step, from gathering basic tools like pencils and paper to mastering advanced techniques such as shading and texturing. The guide emphasizes starting with basic shapes and gradually adding details like scales, wings, and facial features. The keyword drawing:5z_boyjkm98= dragon is used strategically to optimize the article for search engines.
In addition to practical steps, the article provides tips on avoiding common mistakes and encourages experimentation with different dragon types and backgrounds. It concludes by stressing the importance of practice and offers resources for further learning, aiming to help artists create impressive dragon drawings and enhance their overall skills.
Why Draw Dragons?
Dragons symbolize strength and imagination. By drawing dragons, you can explore your creativity while mastering various artistic techniques. From creating detailed scales to mastering the art of shading, drawing dragons allows you to improve your overall drawing skills. This guide will not only teach you how to draw a dragon but also how to give it a personality and life of its own.
Tools and Materials You’ll Need
Basic Drawing Tools
Before you start drawing, gather the essential tools. You’ll need a good-quality pencil, preferably with varying hardness (e.g., HB, 2B, and 4B). The different hardness levels will help you create both light and dark lines, adding depth to your dragon drawing. An eraser is crucial for correcting mistakes and refining details. You’ll also need paper; opt for a smooth surface that will allow your pencil to glide easily.
Optional Tools for Enhanced Detailing
If you want to take your dragon drawing to the next level, consider using a few optional tools. A ruler can help you maintain symmetry, especially when drawing complex wings. Blending stumps are useful for creating smooth gradients in shading. For those interested in digital art, a drawing tablet is a great investment, allowing you to work with various brushes and effects. Remember, the key to mastering drawing:5z_boyjkm98= dragon is having the right tools at your disposal.
Step 1: Sketching the Dragon’s Basic Shape
Drawing the Head: Foundation of Your Dragon
Start by drawing a simple circle to represent the dragon’s head. This circle doesn’t have to be perfect, as it will serve as a guideline. Next, draw a vertical line down the center of the circle. This will help you keep the dragon’s facial features symmetrical. Add a horizontal line across the circle to mark the position of the eyes. These initial lines may seem basic, but they are crucial for laying the foundation of your dragon drawing.
Outlining the Body: Creating the Dragon’s Torso
Extend a long, slightly curved line from the head down to form the dragon’s spine. Use an oval shape to represent the dragon’s torso. The size of the oval should be proportionate to the head, ensuring a balanced appearance. Next, draw a similar but smaller oval for the dragon’s chest, connected to the torso. This skeletal structure will guide you as you add more details in later steps. Remember, precise outlines are key to mastering drawing:5z_boyjkm98= dragon.
Step 2: Defining the Dragon’s Features
Drawing the Eyes: Bringing Your Dragon to Life
The eyes are the window to the soul, even for dragons. Place the eyes on the horizontal line you drew earlier. To give your dragon a fierce look, draw the eyes as narrow ovals with pointed ends. The pupils can be slit-like, similar to those of a cat. This will give your dragon a predatory and intense gaze. Small details, such as the shape of the eyes, can significantly impact the overall character of your dragon.
Shaping the Nostrils and Mouth
Beneath the eyes, add two small, curved lines for the nostrils. These should be positioned close to the center line. For the mouth, draw a long, curved line starting from one side of the head and extending towards the other. To make your dragon look menacing, add sharp, triangular teeth along the mouth line. You can also curve the mouth slightly upwards to create a snarl. Remember, the facial features are crucial in defining the personality of your dragon.
Step 3: Crafting the Dragon’s Wings
Outlining the Wings: Adding Majestic Proportions
The wings are one of the most iconic features of a dragon. Begin by drawing two large, sweeping lines that extend from the dragon’s back. These lines should curve outwards, giving the wings a grand, majestic appearance. Each wing should be about the same length as the dragon’s body. At the end of these lines, draw a semicircle or an oval shape to represent the wings’ tips. These lines will serve as the framework for the dragon’s wings.
Adding Membranes and Wing Bones
Once you’ve outlined the wings, add the membranes. Start by drawing thin lines connecting the wing bones to the dragon’s body. These lines should curve slightly, mimicking the natural flow of the skin between the bones. Make sure to leave some space between each line to give the wings a webbed appearance. Finally, add small claws at the tips of the wings. These claws should be sharp and slightly curved, adding a touch of menace to your dragon’s appearance.
Step 4: Building the Dragon’s Body Structure
Drawing the Legs: Strength and Stability
The legs provide stability and strength to the dragon’s overall form. Begin by drawing the front legs. Use a series of small, connected ovals to represent the joints—one for the shoulder, one for the elbow, and one for the wrist. The legs should be muscular, reflecting the dragon’s strength. For the hind legs, follow a similar approach, but make them slightly thicker and more robust. The hind legs should also be positioned slightly back from the front legs, adding a dynamic feel to the posture.
Detailing the Tail: Adding Balance and Flow
The tail is another essential feature that adds balance to your dragon’s design. Draw a long, tapering line extending from the torso to represent the tail. The tail should gradually thin as it extends, ending in a point or a spade shape. To give the tail texture, add small, overlapping scales along its length. You can also curve the tail slightly to one side, adding movement and flow to your dragon drawing.
Step 5: Adding Texture and Detail to the Dragon
Drawing Scales: Enhancing Realism
Scales are crucial for adding realism and texture to your dragon. Start by drawing small, U-shaped curves along the dragon’s body. These should be tiny near the head and gradually increase in size as they move towards the torso and tail. Make sure to layer the scales, overlapping them slightly to create a natural, textured appearance. The scales should follow the contours of the dragon’s body, emphasizing its muscular structure.
Detailing the Spikes and Horns
Spikes and horns add a fearsome quality to your dragon. Draw a series of spikes along the dragon’s back, starting from the head and extending down to the tail. These spikes should vary in size, with larger ones near the head and smaller ones towards the tail. Add horns on the dragon’s head, either as curved ram-like horns or sharp, straight horns. These elements not only enhance the dragon’s appearance but also contribute to its intimidating presence.
Step 6: Shading and Coloring the Dragon
Mastering Shading: Adding Depth and Dimension
Shading is a critical step in bringing your dragon to life. Start by identifying the light source in your drawing. Shade the areas opposite the light source, such as under the wings, along the belly, and beneath the head. Use a darker pencil to add shadows, creating depth and dimension. Blend the shading using a blending stump or your finger to soften the lines. Shading not only adds realism but also emphasizes the dragon’s form and structure.
Adding Highlights: Creating a 3D Effect
Highlights are just as important as shadows in creating a 3D effect. Use an eraser to lift graphite and create highlights on the dragon’s scales, wings, and tail. Focus on areas that would naturally catch the light, such as the top of the head, the edges of the wings, and the tips of the scales. Highlights give the illusion of light reflecting off the dragon’s surface, making it appear more realistic and vibrant.
Choosing Colors: Bringing Your Dragon to Life
Color can significantly impact the mood and personality of your dragon. For a traditional dragon, consider using shades of green, red, or gold. Start with a base color and gradually add darker shades for depth. Use lighter colors for highlights, especially on the scales and wings. You can also experiment with non-traditional colors like blue or purple for a more mystical appearance. The key is to choose colors that complement each other and enhance the dragon’s overall design.
Step 7: Finalizing Your Dragon Drawing
Inking Your Drawing: Defining the Final Lines
Inking is the final step that gives your dragon drawing a polished, finished look. Use a fine-tip pen to go over the lines of your drawing, emphasizing the details. Be careful to follow the contours of your sketch, maintaining the proportions and symmetry. Inking not only defines the lines but also makes the drawing more durable, especially if you plan to color it with markers or paint.
Reviewing and Refining: Ensuring Proportions and Details
After inking, take a step back and review your drawing. Check the proportions of the head, body, wings, and tail. Make sure all elements are in harmony. Look for any areas that may need refining, such as adding more scales, enhancing shading, or adjusting the shape of the wings. This review process is essential for perfecting your dragon drawing and ensuring it meets your expectations.
Advanced Techniques for Dragon Drawing
Experimenting with Different Dragon Types
Once you’ve mastered the basic dragon, try experimenting with different types of dragons. For example, you can draw a Chinese dragon with a long, serpentine body, or a Western dragon with four legs and large wings. Each type of dragon has unique features that will challenge your skills and help you grow as an artist. Experimenting with different dragon types will also keep your practice sessions interesting and diverse.
Adding Backgrounds and Environments
To take your dragon drawing to the next level, consider adding a background or environment. You can place your dragon in a medieval landscape, flying over mountains, or perched on a cliff. Adding a background not only enhances the overall composition but also tells a story. It provides context and adds depth to your drawing. When adding a background, remember to consider the lighting and perspective to ensure everything looks cohesive.
Incorporating Motion and Action
Adding motion to your dragon drawing can make it more dynamic and exciting. You can draw your dragon in mid-flight, with wings spread wide, or while breathing fire. To convey motion, use sweeping lines and curves, especially in the wings and tail. Consider the direction of the dragon’s movement and add elements like wind or dust to enhance the action. Incorporating motion will make your dragon drawing more engaging and lifelike.
Common Mistakes to Avoid When Drawing Dragons
Ignoring Proportions
One of the most common mistakes is ignoring proportions. A dragon with a tiny head and huge wings might look awkward and unbalanced. Always start with basic shapes and guidelines to ensure your dragon’s proportions are correct. This will help you create a more realistic and cohesive drawing.
Overcomplicating the Design
While details are important, it’s easy to overcomplicate the design. Too many scales, spikes, or intricate patterns can overwhelm the drawing and make it look cluttered. Focus on key features and add details where they will have the most impact. Simplicity can often be more effective in conveying the power and majesty of a dragon.
Neglecting the Background
Another mistake is neglecting the background. A dragon floating in a space can look disconnected and unfinished. Even a simple background, like clouds or mountains, can add context and depth to your drawing. Consider how the background interacts with the dragon and contributes to the overall composition. If you want to read more visit our website.
Conclusion
Drawing a dragon is a rewarding experience that allows you to explore your creativity and improve your art skills. By following this comprehensive guide, you’ll be able to create a stunning dragon drawing that captures the essence of these mythical creatures. Remember, practice is key. The more you draw, the better you’ll become at mastering drawing:5z_boyjkm98= dragon. Keep experimenting with different styles, techniques, and details to develop your unique dragon drawings. see more.
FAQ’s
How Long Does It Typically Take to Draw a Dragon?
The time it takes to draw a dragon varies depending on the complexity and detail. A simple sketch might take an hour, while a detailed drawing could take several hours or even days. It’s important to take your time and enjoy the process, rather than rushing to finish.
Can I Use This Guide for Digital Dragon Art?
Absolutely! This guide is suitable for both traditional and digital art. If you’re using a digital drawing tablet, you can follow the same steps. Digital tools offer additional flexibility with layers, brushes, and effects, which can enhance your dragon drawing even further.
What Should I Do If I’m Not Satisfied with My Dragon Drawing?
If you’re not happy with your dragon drawing, don’t be discouraged. Art is a process, and improvement comes with practice. Try to identify what you’re not satisfied with and focus on improving those areas in your next drawing. Consider seeking feedback from other artists, which can provide new insights and ideas.
How Can I Make My Dragon Drawing More Unique?
To make your dragon drawing stand out, try experimenting with different styles and elements. You can mix features from different dragon types, use unconventional colors, or add accessories like armor or jewelry. Adding personal touches will make your dragon unique and reflect your artistic style.
Where Can I Find More Resources on Drawing Dragons?
There are plenty of online tutorials, books, and videos dedicated to drawing dragons. Websites like YouTube, DeviantArt, and art forums are excellent places to find inspiration and learn new techniques. Additionally, participating in art challenges or joining an art community can provide motivation and support as you continue to develop your skills.